Microsoft Teams Meetings that Require Registration
Sounds like an awesome new feature right? Well it is, kind of. Just isn’t well documented or obvious in the GUI how to use it and set one up!
Firstly, you can’t do this from Outlook, you have to use Microsoft Teams.
Step 1 – Create Event
Go to your Calendar, go to top right hand corner and choose New Meeting or New Webinar. You will see the option for Require registration in the ribbon
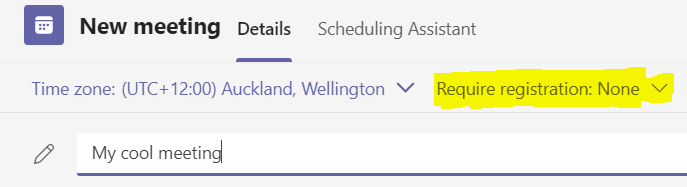
Step 2 – Set Require Registration Option
And here’s the trap for new players… Do not add attendees here. Before you require registration you have the “add require attendees” option, but AFTER you require registration, this changes to Add presenters.
It’s very subtle. If you add your people in here, they will just be able to join the event/meetings like plain old normal.
| Before Require Registration | After Require Registration |
| The giveaway is before you require registrations, the list is to Add required attendees | After you set require registration this changes to presenters – Thus, when you add people here they can just join the meeting! |
 |  |
Step 3- Complete registration form, and save URL.

Be sure to view and customize your form. You should populate the Event details Title, add any Speakers and modify any data you want to capture. Default is First name, Last name, Email. You can add your own logo too (which is not sticky / persistent next time you come back to this form)
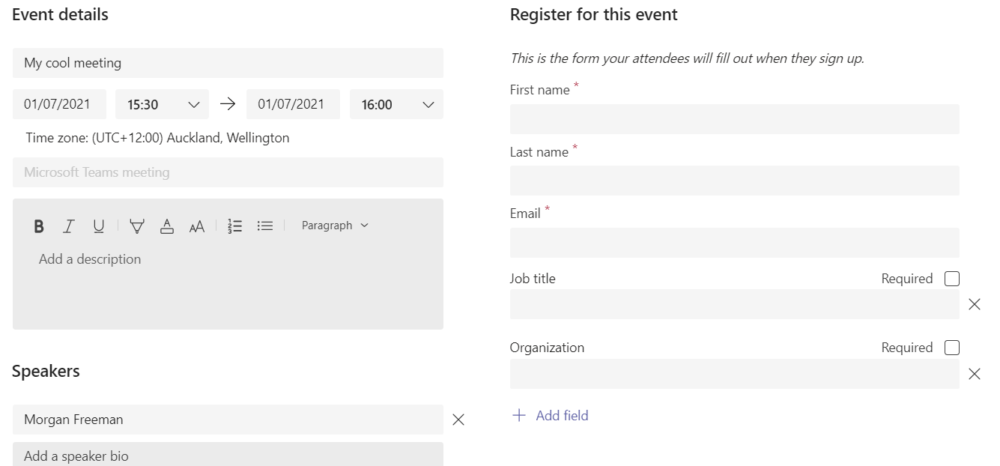
BEWARE: You can set a different start time / end time in here and it is not copied back / reflected to the Event you just created!!
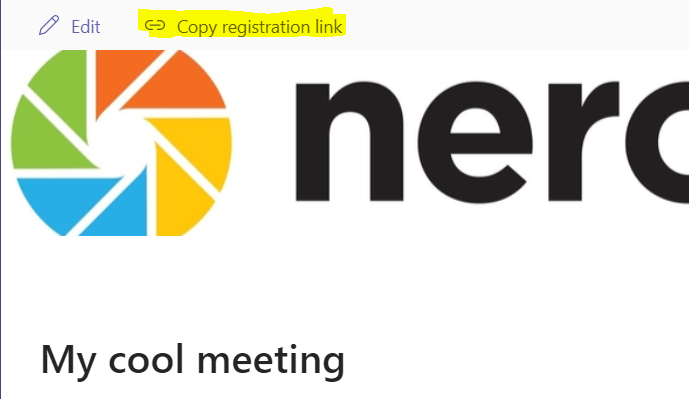
Step 4 – Copy registration link
Step 5 – Send (Save your placeholder)
- Send – If you added any presenters and…
- Send – if you didn’t. That way it saves on your Calendar.
Step 6 – Send an Email to the attendees/participants
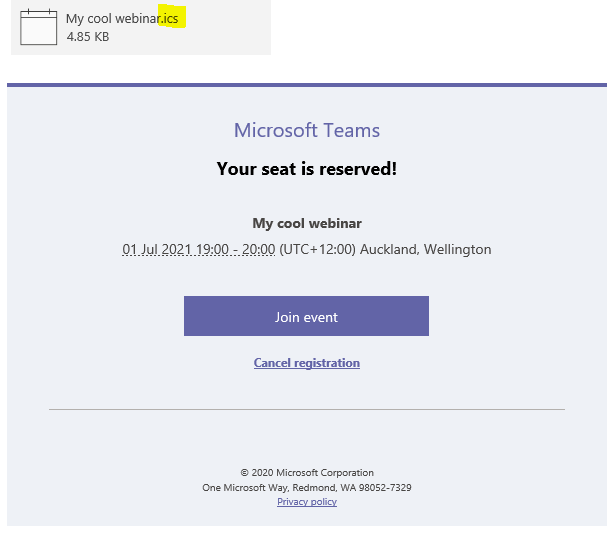
Send your email with blurb and sign-up link. Once an attendee registers, they will receive back an ICS file / Invite to add to their Calendar, and you will see them listed back in the meetings. NOTE: There is nothing to stop attendees registering more than once!
Attendees receive back a confirmation with an ICS file that adds the event to their Calendar
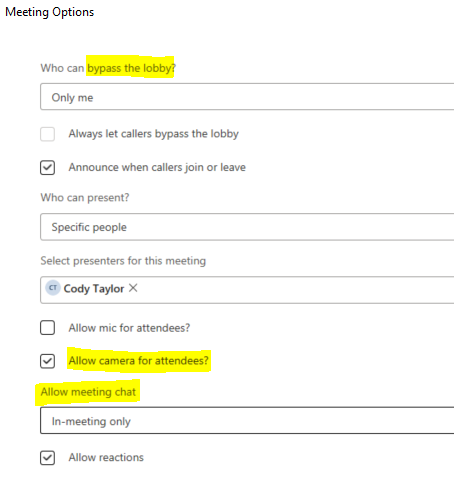
Step 7 – Set Meeting Options
Open your event back up in Outlook now or Teams and set the Meeting options
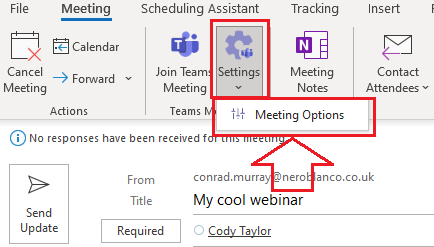
Consider setting Who can bypass the lobby, Mic & Camera for attendees and how you would like to manage meeting chat. Remember to Save Changes to meeting when prompted!
Step 8 – Check who has registered
Back to Teams, open your event, click on Attendance on the ribbon

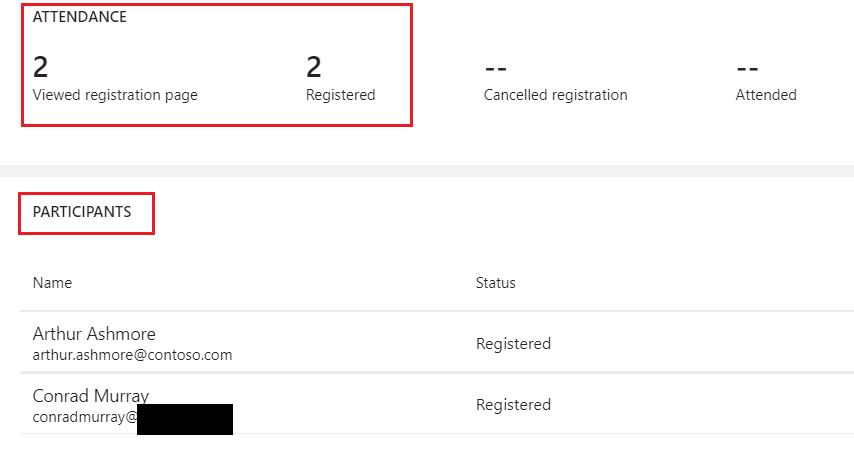
Not as simple and clear as we would like it to be. It’s a bit of a faff, but kind of works!
Good luck.