
Creating an Azure VM from a SysPrep image that was Security hardened by GPO
Recently we needed to extend our Migration Farm from 10 workers machines, to 20. As we have these workers machines humming now, the logical step was to clone one machine and create 10 new VMs from that image.
So I duly went about creating that images via SysPrep. Pretty straightforward, follow along with this guide and you’re golden:
https://docs.microsoft.com/en-us/azure/virtual-machines/windows/capture-image-resource
or this one
https://docs.microsoft.com/en-us/azure/virtual-machines/windows/create-vm-generalized-managed
- SysPrep and Generalize
- Shutdown
- Create managed image
- Then use that Image as the basis for your new machine (select a few options like machine size, open ports and the admin username and password NOTE: Do not ever forget that admin username and password…. As we will see later.
What went wrong?
Well, the server I created my SysPrep image from was a Production Server in a Managed OU in AD where we had applied Security Policies to harden the Servers.
Specifically, the Deny access to this computer from the network and Deny log on through Remote Desktop Services policies.
So even though the SysPrep was set to “System Out-of-Box Experience” and Generalize, the hardening information had been tattooed to the registry including restricting RDP access to selected users only. So, when I started my machine that was in a WORKGROUP, no-one could log on, not even the local admin account created from above when provisioning the machine in Azure.
This is the message I was greeted with at first start up and connection over RDP:

The system administrator has restricted the types of logon (network or interactive) that you may use. For assistance, contact your system administrator or technical support.
The Solution
Well truth be told my colleague ran into this once before and we tried a whole host of ways to correct the registry keys by command line to allow us to get past this screen, but to no avail trying to get the correct combo, when it occurred to us it would just be easier to use Command Line to add the machine to the AD Domain, the correct users would be able to log on as normal and problem solved – but how to get to the command line from Azure…
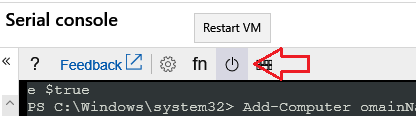
Serial Console
Enter the Serial Console to the rescue. On 26 March 2018, Microsoft added the serial console to the Azure offering. https://azure.microsoft.com/en-us/blog/virtual-machine-serial-console-access/
If you select Virtual Machine, then scroll pretty much all the way to the bottom of the slide out pane for your machine, you will see Serial Console 3rd from bottom of the list under “Support + troubleshooting”
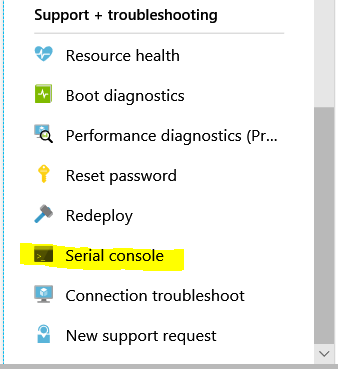
Click on that and eventually you see this screen:
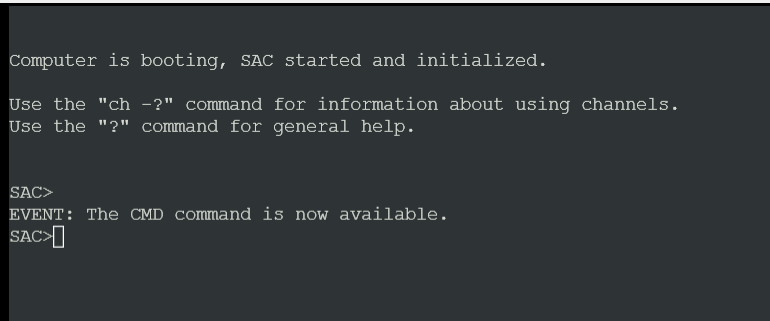
The following commands get you to where you need to be:
CMD + Enter
ch -si 1 +
Enter
Hit Enter again
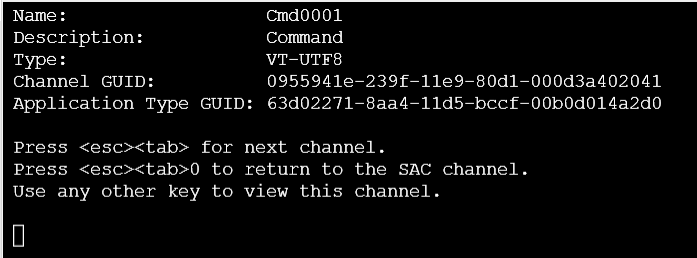
Now enter your local admin username and password you configured when you created this VM

e.g.
Please enter login credentials.
- Username: localadmin
- Domain :
- Password: ************
(just Enter through the Domain Prompt)
Now you are here:
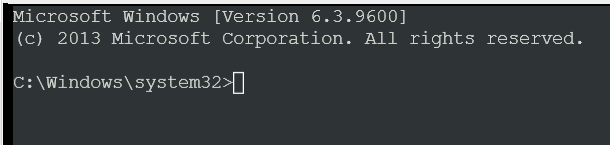
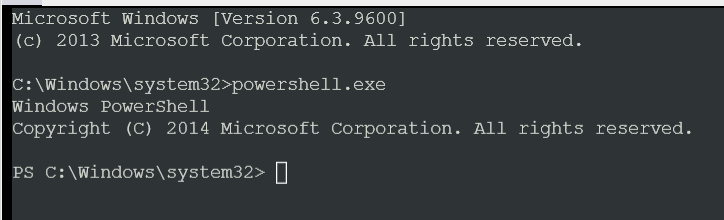
Type in powershell.exe to access PowerShell
Now you can add the computer to the Domain but… when you use PowerShell to do this, you are prompted for Credentials, but in this serial console mode you cant get a “pop up box”.
So the trick here is to configure the registry to NOT use pop-ups, but instead allow you to set your credentials in the command line.
First do this: (one line at a time)
$key =
"HKLM:\SOFTWARE\Microsoft\PowerShell\1\ShellIds" + Enter
Set-ItemProperty -Path $key -Name
ConsolePrompting -Value $true + Enter
Now you can use this:
Add-Computer –DomainName contoso.com
+ Enter
(note, I couldn’t paste this command, I had to type it manually, pasting it kept dropping characters)
You can avoid the PowerShell method of adding a computer to Domain, by also using:
netdom join
THE_COMPUTER_NAME /domain:CONTOSO.COM /userd:CONTOSO\Administrator /passwordd:********
For some reason I couldn’t get this to work 1st time for me for whatever reason, so I just moved straight to PowerShell
Now reboot the Azure machine:
Voila!
Log on, then go to your Domain Controller and move this machine to the correct Managed OU.
